Guides/Timeline
Cut on the timeline
Split, trim, ripple, merge, freeze, reverse, speed, detach audio, several timelines per project. The whole editing vocabulary on one page.

The tray. On Windows and Linux read Ctrl for ⌘ throughout this page.
Get around
- Scrub: drag on the ruler, or click anywhere on the timeline to send the playhead there. Click the timecode under the monitor to type a time.
- Play: Space. ← and → step a frame, with Shift ten frames. Home and End jump to the ends.
- Zoom: ⌘ + wheel zooms about the pointer; ⌘= and ⌘- step; the fit button at the right of the tray shows the whole cut.
- Scroll: the wheel scrolls the lanes up and down, Shift + wheel (or a horizontal wheel) scrolls time. H turns on the pan tool, where a drag scrolls instead of selecting. The scrollbar under the lanes shows which part is in view.
- Preview axis (S): the monitor shows the frame under the pointer as it crosses the lanes, so you can find a moment without scrubbing.
Select
Click a clip. Shift-click or ⌘-click adds to the selection, on the lanes and on the monitor alike. Drag on empty floor to draw a band.
⌘A selects everything.
Split
- ⌘B, or Split at playhead on the tray, cuts at the playhead. In 0.2.7 the key and the Edit menu cut every clip under the playhead, titles and music included, while the tray button and the clip menu cut only the selection. From 0.2.8 all of them cut the selected clips, and everything under the playhead only when nothing is selected.
- B turns on the razor: a hairline follows the pointer, and a click on a clip cuts it on that frame. Press B again to put it away.
- Merge selected joins two pieces of the same file that meet back into one clip.
Delete left and right
CapCut’s two fastest cuts. Put the playhead inside a clip and:
- Q, or Delete left on the tray beside Split, removes the clip from its start up to the playhead.
- W, or Delete right, removes it from the playhead to its end.
They cut the selected clips the playhead is over, on every lane at once, as one undo step. With nothing selected they cut the one clip under the playhead; with several there, a notice asks you to select one rather than guess between the picture and the caption over it. On a magnetic timeline the gap closes up, and after Q the playhead lands on the frame it was showing. Both are on a clip’s right-click menu too (the More menu on a phone), and both keys can be changed in Settings › Shortcuts.
Trim and move
Drag a clip’s left or right edge to trim it; drag the clip to move it. Snap to edges (N, on by default) makes edges and the playhead stick to each other. Trim follow on the tray makes the playhead ride the edge you trim, so the monitor shows the new in or out point while you drag.
Delete and ripple
Delete removes the selection. What happens to the gap is the Magnetic timeline switch on the tray (also in Settings › General):
- Off (the default): a delete leaves a gap, a trim moves only the edge.
- On: deleting pulls what follows on the same track into the gap, and trimming an edge moves the rest of the track with it.
Shift+Delete closes the gap either way, once.
Freeze, reverse, mirror, rotate
The menu after Delete on the tray acts on the selected clip:
- Freeze: park the playhead inside a picture clip and the frame under it becomes a still. From 0.2.8 F does it from the keyboard.
- Reverse: the clip is rendered backwards into the project cache; the clip then shows the copy. One at a time.
- Mirror flips horizontally. Rotate turns a quarter clockwise. Both can be keyframed from the Inspector.
Speed
Select the clip and set Rate in the Inspector’s Speed section. Rate re-times the clip in place, so its length on the timeline changes; trim afterwards, not before. For sound, Change pitch with speed decides whether a sped-up voice goes up in pitch (off by default).
Sound on a video clip
- The thin line across a clip with sound is its volume; drag it. It snaps at 100 percent.
- Right-click the clip for Detach audio: the sound becomes a clip of its own on a lane below, so you can offset it or treat it separately. Reattach audio puts a detached pair back together.
- Save Audio As… in the same menu renders the clip’s sound, with its treatments, to a WAV and files it under Generated › Processed.
- M mutes the selected clip.
- Several clips with sound selected: from 0.2.8 the Inspector sets their volume together. See clean up a voice.
Level meters
In 0.2.7 the VU meters are a pane of their own beside the timeline, showing how loud the timeline plays, left and right, with a clip light that turns red when the mix reaches full scale (click it to clear) and a peak readout. Add it from Add a panel if it is not on screen.
Tracks
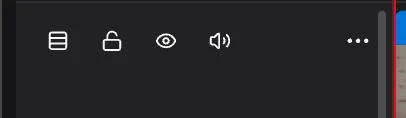
Row height, lock, hide, mute, More.
The plus at the left of the tray adds a track, to the top or the bottom. Lanes have no names. Each header has a row-height picker (Auto, Small, Medium, Large), a lock, an eye, a mute, and a More menu that holds Delete. Deleting a track asks first and says how many clips go with it; it can be undone. Drag the edge of the header column to make it wider.
Several timelines
The tabs above the tray are timelines. The plus adds one; double-click a tab to rename it; drag to reorder; hover for the close cross. Each timeline has its own frame, rate and colour, so a project can hold a 16:9 cut and a 9:16 cut of the same footage, and the Export sheet exports whichever is active.
Copy, paste, duplicate
⌘C, ⌘V and ⌘D work on clips, including across timelines. A paste lands at the playhead and is one undo step.
In 0.2.7 a copy or duplicate of the second half of a split clip can show the wrong frames (usually the file’s opening ones). 0.2.8 fixes it.